Tuesday, December 17, 2019

Dresses 33 through 39 - A Passel of Peasants

This passel of peasants is one of my favorite go-to patterns.


Peasant Dress by Jamie Sanders for Scattered Thoughts of a Crafty Mom

Jamie created this darling peasant dress.  Its the easiest dress to make, and its so fast, you can make several in a weekend.  

For her free pattern and instructions, click HERE
There are only 2 pattern pieces:  the body and the sleeve, of which you cut two of each.  Then make a matching pocket or two from the scraps!   Sizes run from 12 months to 14 years.  As Jamie says, you can make it as a dress, and as they grow older and taller, it becomes a tunic.

The first batch of these dresses I made were the length of the actual pattern.  Jamie says the finished pattern hits right above the knee.   It may be a good idea to add an inch or two at the bottom for maximum wear.

Following the sewing instructions,  the thing that helped me the most was this little chart Jamie drew for connecting the pieces:

Once this is done, sew the side seams from the sleeve to the hem and your basic dress is complete. Hem it, and make your elastic casing around the neck, and if gathering the sleeve, do these too.   I put 1/4 inch elastic in the casings.  Here is the elastic length charts:

Neck elastic length
  • 12 to 18 months: 15 to 16 inches              
  • 2t/3t: 17 to 20 inches
  • 4/6: 19 to 20 inches
  • 7: 20 to 21 inches
  • 8: 21 to 22
  • 10: 22 to 23
  • 12: 23 to 23.5
  • 14: 23.5 to 24 
Arm elastic length
  • 12 to 18 months: 7 to 7.5 inches
  • 2t/3t: 8 inches
  • 4/6: 8.75 inches
  • 7: 9 to 9.5 inches
  • 8: 9 to 9.5 inches
  • 10: 9.75 to 10
  • 12: 10.25 to 10.5
  • 14: 10.5 to 11                                 Some dresses I gathered the sleeves, others I left open.


You will be seeing more of these in future blog posts 😊


Monday, November 25, 2019

This is Why I Sew - My Inspiration

While I am healing from some neck issues, I haven't been sewing as much as I should.  I have had to content myself on just cutting out a stack of dresses, ready to sew.  I also took this downtime to reflect on why I sew these dresses, and the below photos say it all.  It renews my resolve to get back on my horse, so to speak, and get these dresses done!

I have sent a few dozen to Monica for her Operation Christmas Child shoebox gifts.   I have even more set aside for Shelley when she leaves for Uganda in one year.   So, I have this one year to get back up to speed and get those 100 dresses done for her.


The following pictures have been taken from Dress A Girl Around the World Facebook photos.

BEFORE AND AFTER


BEFORE


AFTER - BEAUTIFUL SHINING FACES! 


These beautiful girls say more than I can.


Sunday, September 22, 2019

Dresses 31 and 32 - Under the Sea


Under the sea, under the sea                         
Darling its better, down where its wetter
Take it from me.

Up on the shore they work all day
Out in the sun they slave away,
While we devotin' full time to floatin'
Under the sea.
                             The Little Mermaid


Its September now, and hot.   I would love to be under the sea where its cooler.

This fabric is from Monica, and reminds me so much of this song.  I love the whale in this print.  Here are two more dresses made from the August pattern.

Tuesday, June 11, 2019

Dresses 26 through 30 - Magical August


"Everything good, everything Magical, happens between the months of June and August"
                                                                        Jenny Han, The Summer I Turned Pretty
 
This quote sure fits - In June, I sewed these five August dresses!  I previously showed you the first dress I made from this pattern.  It is my favorite dress I have made to date.  Below are the steps I used to make them, following Jess' perfect and easy instructions.  Links to her website, pattern and instructions are below.

The August Dress Pattern from Happy Together by Jess
                               
Web Site/Instructions
Pattern

This adorable dress slips over the head, and comes in sizes 2 to 9.

  • Size 2/3: chest measurement 20″-21″
  • Size 4/5: chest measurement 22″-23″
  • Size 6/7: chest measurement 24″-25″
  • Size 8/9: chest measurement 26″-27.5

I decided to do the same step to the dresses all at the same time, like an assembly line.  Here are the fabrics:


1.  Ships Ahoy!   Both of these fabrics are by Riley Blake.

2.  Busy Bee.   The bee fabric is by Michael Miller and the brown dot a remnant I had.


3.  Monkey Business.  I got both at Joann's Fabrics.


4.  Summer Sizzle.      These are both remnant pieces from Walmart.

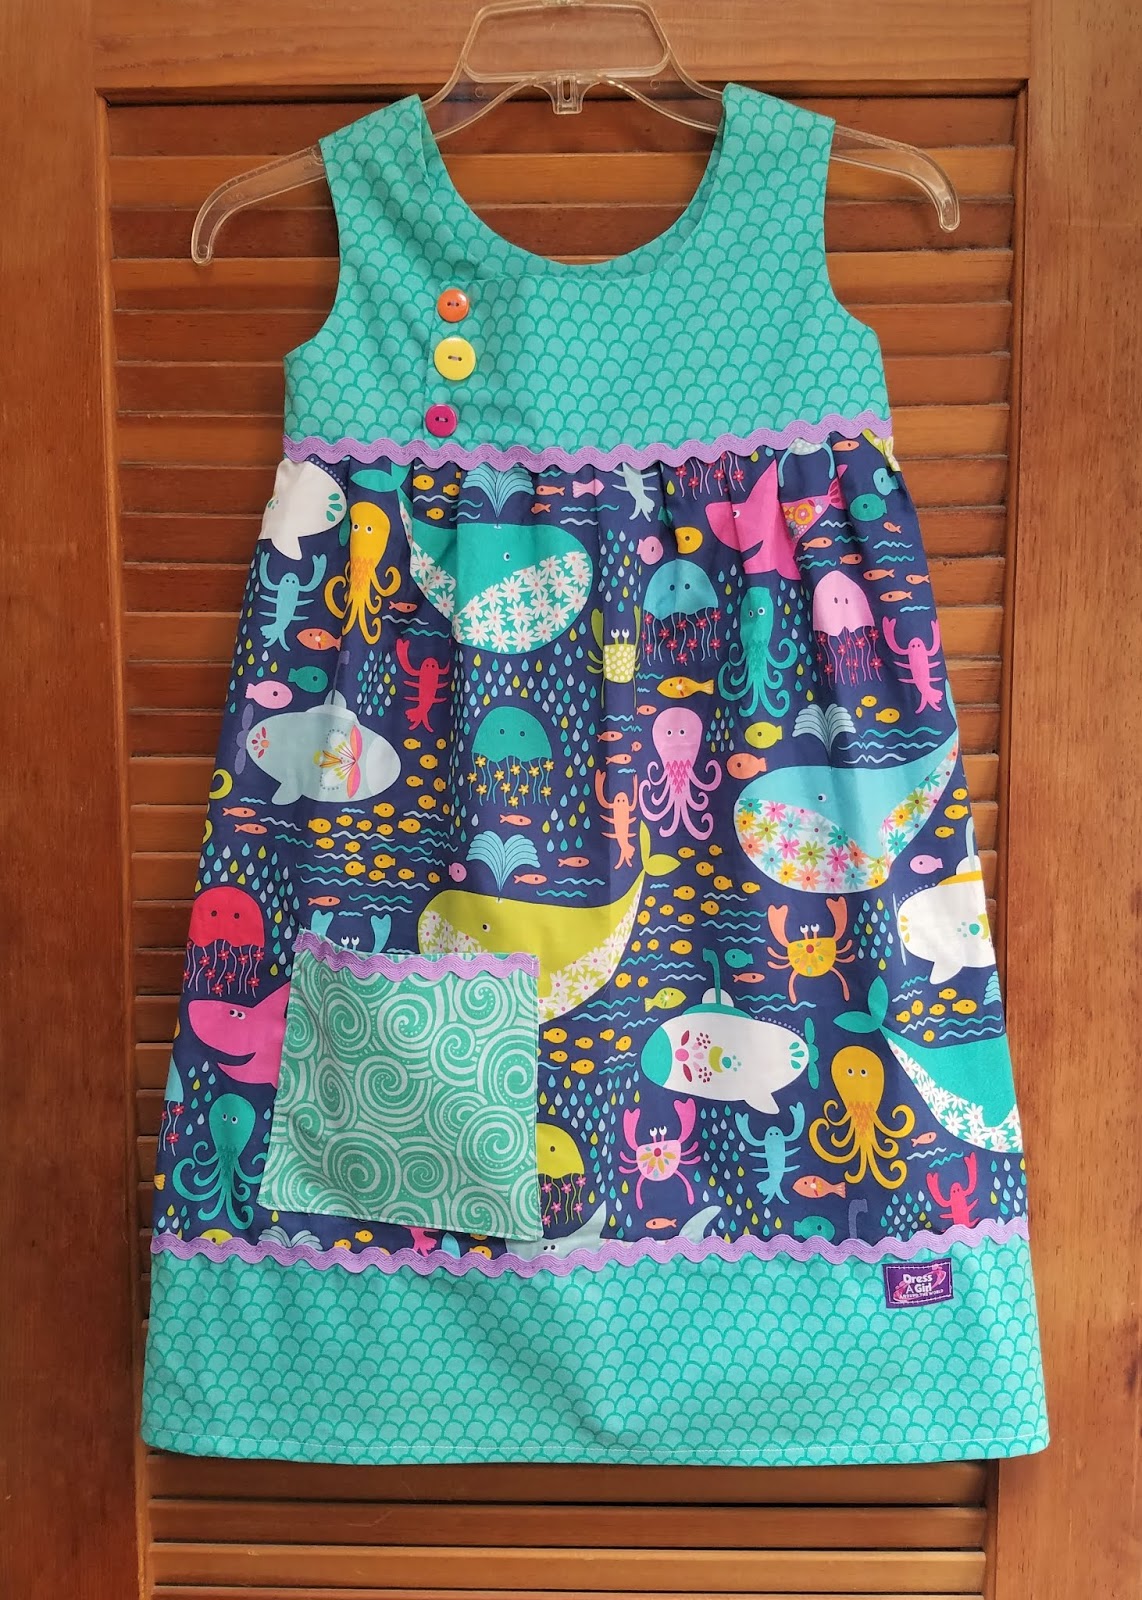
5.  August Aquarium.    Blend Fabrics from the Go Fish collection.

Following the pattern instructions I printed, I cut the bodice pieces and lining in a size 6/7.  I made all these the same size for assembly ease, but will be making several different sizes later.   I cut the skirt portion 18 inches (half yard) long, and the contrast band 6 inches.


Sew the Shoulder seams together on both fabric and lining.  Open up flat, and sew the fabric to the lining right sides together around the neckline, and the armholes.  Leave sides open.  Clip all seams.
 

Turn the bodice right side out, and iron.  Open the side seams and sew right sides together.  That's it!  Jess' instructions show every step very clearly, its SEW easy!  I made the five bodices in about  2 1/2 hours.  I did the longer front side opposite on two of them. Then I laid out buttons to see what I liked on each one.

Below, cross the long front piece over the short
one and pin.   Sew your buttons through both front pieces to tack them together.  These are decorative, the dress slips over the head.  Bottom edge is secured when attached to the skirt.


Next, I prepared the skirts.  First, I did a French seam to attach the bottom contrast.  This is my personal preference, you do not have to add the contrast.  If you don't, make sure your skirt is cut long enough.   Next, I hemmed the skirt.  Finally, I sewed up the side with a French seam.   You may also zig zag or serge the seams instead.  That's all there is to it! 

Below right, Casey tired out before he finished sewing.
Attaching the Skirt.
You may do this two ways:   Gather the top to fit, or pleat it to fit.  I chose loose pleats, its faster for me than trying to even out a gather stitch!  Its also flatter, too.  Find the front, back and sides of both the skirt and bodice and stick a pin in to mark the points.  Then, attach bodice to skirt at the four points.  Pleat the skirt in the four sections and pin evenly to the OUTER FABRIC only, not the lining.  Leave that loose.   Sew the skirt to the bodice outer fabric.  Turn the dress inside out, folding the lining over the seam.  Sew it down.  Your inside is now neat and all seams enclosed.


I added a pocket and some trim, and done.  Here are the finished dresses:

Ships Ahoy!                                                                                      Summer Sizzle

Busy Bee                                                                                         August Aquarium

Monkey Business